
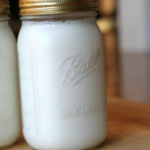
Making yogurt at home is easier than you think. Making yogurt for yourself ensures that you are receiving the best quality dairy product and the most beneficial amount of probiotics. Using either raw whole milk or organic, non-homogenized whole milk will produce the healthiest, yummiest yogurt you have ever had. Commercial yogurts are often not fermented long enough to produce enough “good” organisms, and are often fermented in plastic containers which can leach into your food.
I use Straus Family Creamery Organic whole milk for this recipe. I ferment it for 16-20 hours in my Excaliber dehydrator at 115′ F. Traditionally, yogurt is only fermented for 8-10 hours. This longer fermenting time will ferment away most of the lactose, making it more digestible. The lactose is fermented into lactic acid which gives yogurt a tart tastes. I eat it plain, but my teenager adds a titch of maple syrup to eat to make it a bit sweeter. You can reduce the fermentation time if you want a milder yogurt. Feel free to experiment. The longer fermentation also results in a higher probiotic bacteria count.
If you do not have a dehydrator to ferment your yogurt in, there are some easy-to- use yogurt makers out on the market. You can also leave the milk/yogurt mixture in the pot, cover with lid and dish towel, and place in unheated oven overnight. The idea is that the oven is insulated and will keep the mixture at 105-110′ F, an ideal temperature for fermentation. I’ve seen someone use a heating pad overnight to keep the yogurt warm. I have also read about making yogurt in the crock pot. I would love to hear how this works out if anyone tries it.
NOTE:
Using just plain raw milk for this recipe and not heating it to a boil may produce a much runnier yogurt than you are used to. Emily from the Holistic Squid has a great recipe combining raw milk, raw cream, and boiled milk that produces an amazingly creamy, thick yogurt.
 This yogurt is delicious plain or with a bit of honey or maple syrup added. I have also added a little fruit-sweetened berry jam to it for a yummy treat.
Homemade Yogurt
- Yield: 1 quart 1x
Ingredients
- 1 quart organic, non-homogenized, whole milk
- 3-4 TBS leftover yogurt form your last batch OR good quality store-bought plain yogurt
- candy thermometer
- quart-sized glass jar with lid
Instructions
- Carefully clean all equipment to be used. Pour boiling water into glass quart jar to be used for fermentation OR place in oven at 200’F for 15 minutes to kill any unwanted bacteria.
- Place thermometer, jar lid, and spoon for stirring into glass bowl and pour boiling water over. Let sit at least 5 minutes.
- Pour milk into medium pot and heat to just below a boil (around 170-180′ F). This will ensure that only your “good” bacteria will grow in your yogurt.
- Remove from heat and place in a cold water bath in the sink.
- Let cool until milk is at 110-115′ F, and then carefully stir in yogurt with clean spoon.
- Pour mixture into clean glass quart jar and cover with lid
- Ferment for 12-20 hours to produce a wonderfully creamy, probiotic-filled yogurt.
- Store in refrigerator.

A candy thermometer makes this job easy

I make a cool water bath in the sink

As an Amazon Associate I earn from qualifying purchases.
I can’t wait to make my own yogurt! I got all the ingredients and hope to do it this weekend! I will let you know how it goes!
yay! You will never want to buy store bought yogurt again. And please share when you do it…. 🙂
I make yogurt in my crock pot, and it works great. There are many recipes out there that you can google and read. What works best is to plug in your crockpot to preheat. Set out your yogurt starter to bring up to temp. Bring milk to 180, then cool in water bath to 120. Temper yogurt with some of the milk, then add all together. Tun off crockpot, unplug and add in milk/yogurt mixture. Wrap crockpot in two bath towels and set somewhere draft free for at least 10 hours. I will try leaving it for 12 hours when I make it again. I have had 2 different batches fail, and I knew it when it happened. Once I forgot and my mixture got too cool and crockpot too hot. The other time I did not temper the culture, and killed it by adding it directly into the milk at 120. I usually do it overnight, then put in the fridge for a day or 2 to let it set up. Good luck!
Thanks so much for this. I’m going to try this as soon as my crock is free. Making tons of broths. 🙂
I live in asia and i make yogurt in the ubiquitous rice cooker–you don’t even have to turn it on, just pour in the yogurt/milk after boiling + cooling, close the lid and it insulates the yogurt for hours. i leave it in overnight or during work, and though i have to strain the yogurt to make it the thickness i like, it works really well!
great idea! Thanks for sharing.
What brands of store bought yogurt are good quality to use as your start?
Any plain (non flavored) organic whole milk yogurt will work just fine.
How about nut milk alternatives ?
Yes, I should do a dairy free yogurt recipe. SOON! 🙂